DIY: Replacing Your Cabin Air Filter
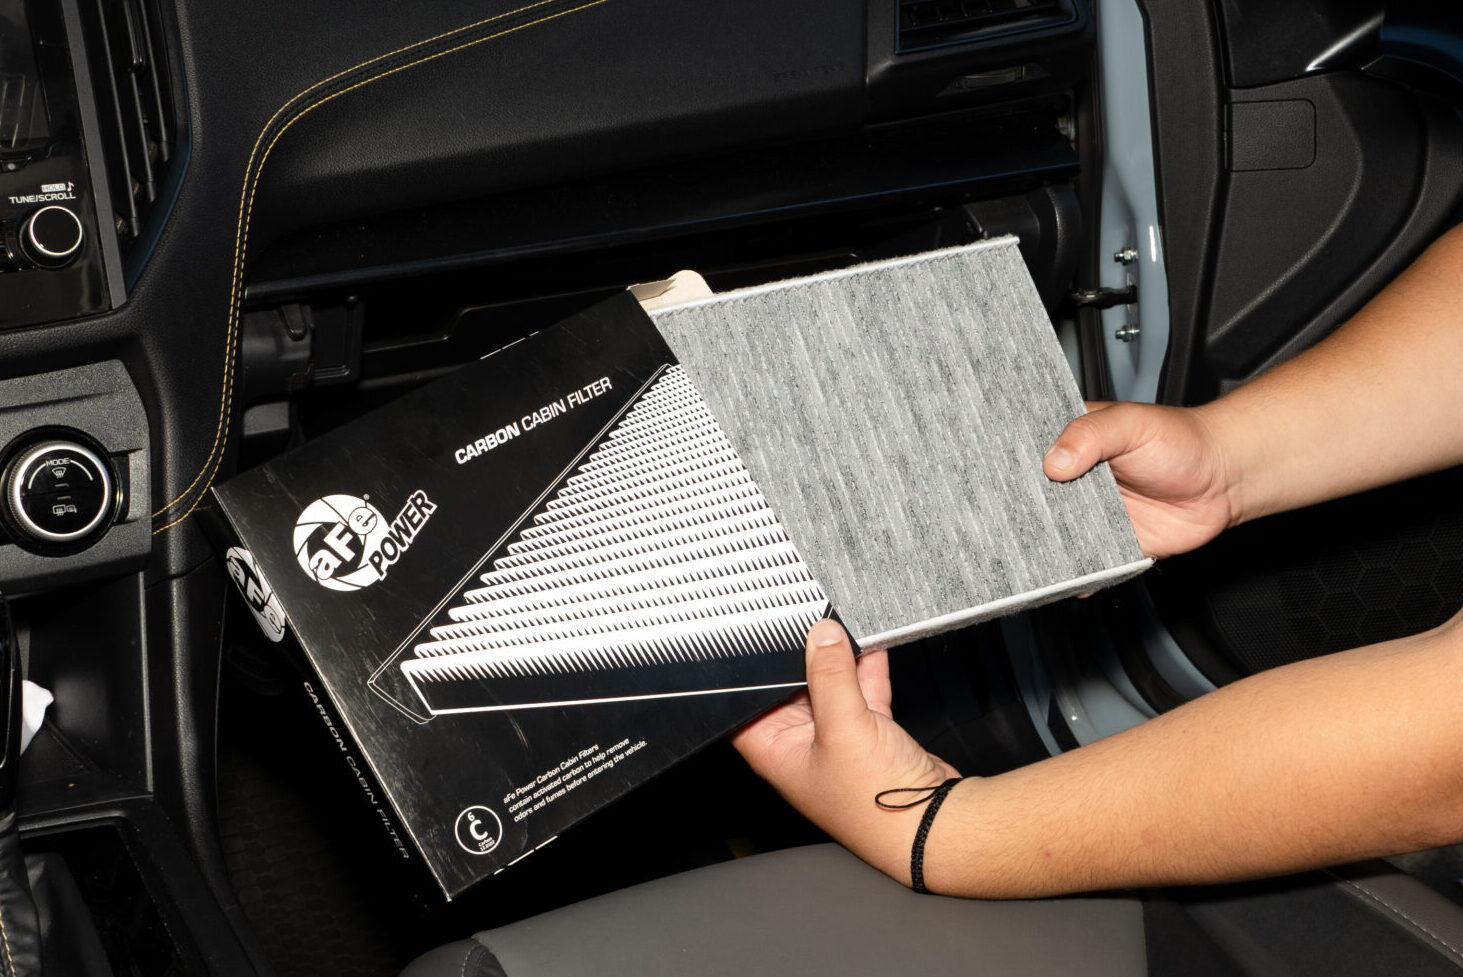
Why It’s Time to Replace Your Cabin Air Filter
Summer is here, which means your vehicle’s air conditioning system is working harder than ever to keep you comfortable. If your cabin air filter is past its recommended service, it can restrict airflow, allow unwanted odors to circulate, and force your HVAC system to work harder than necessary. That’s why summer is the perfect time to replace your cabin air filter.
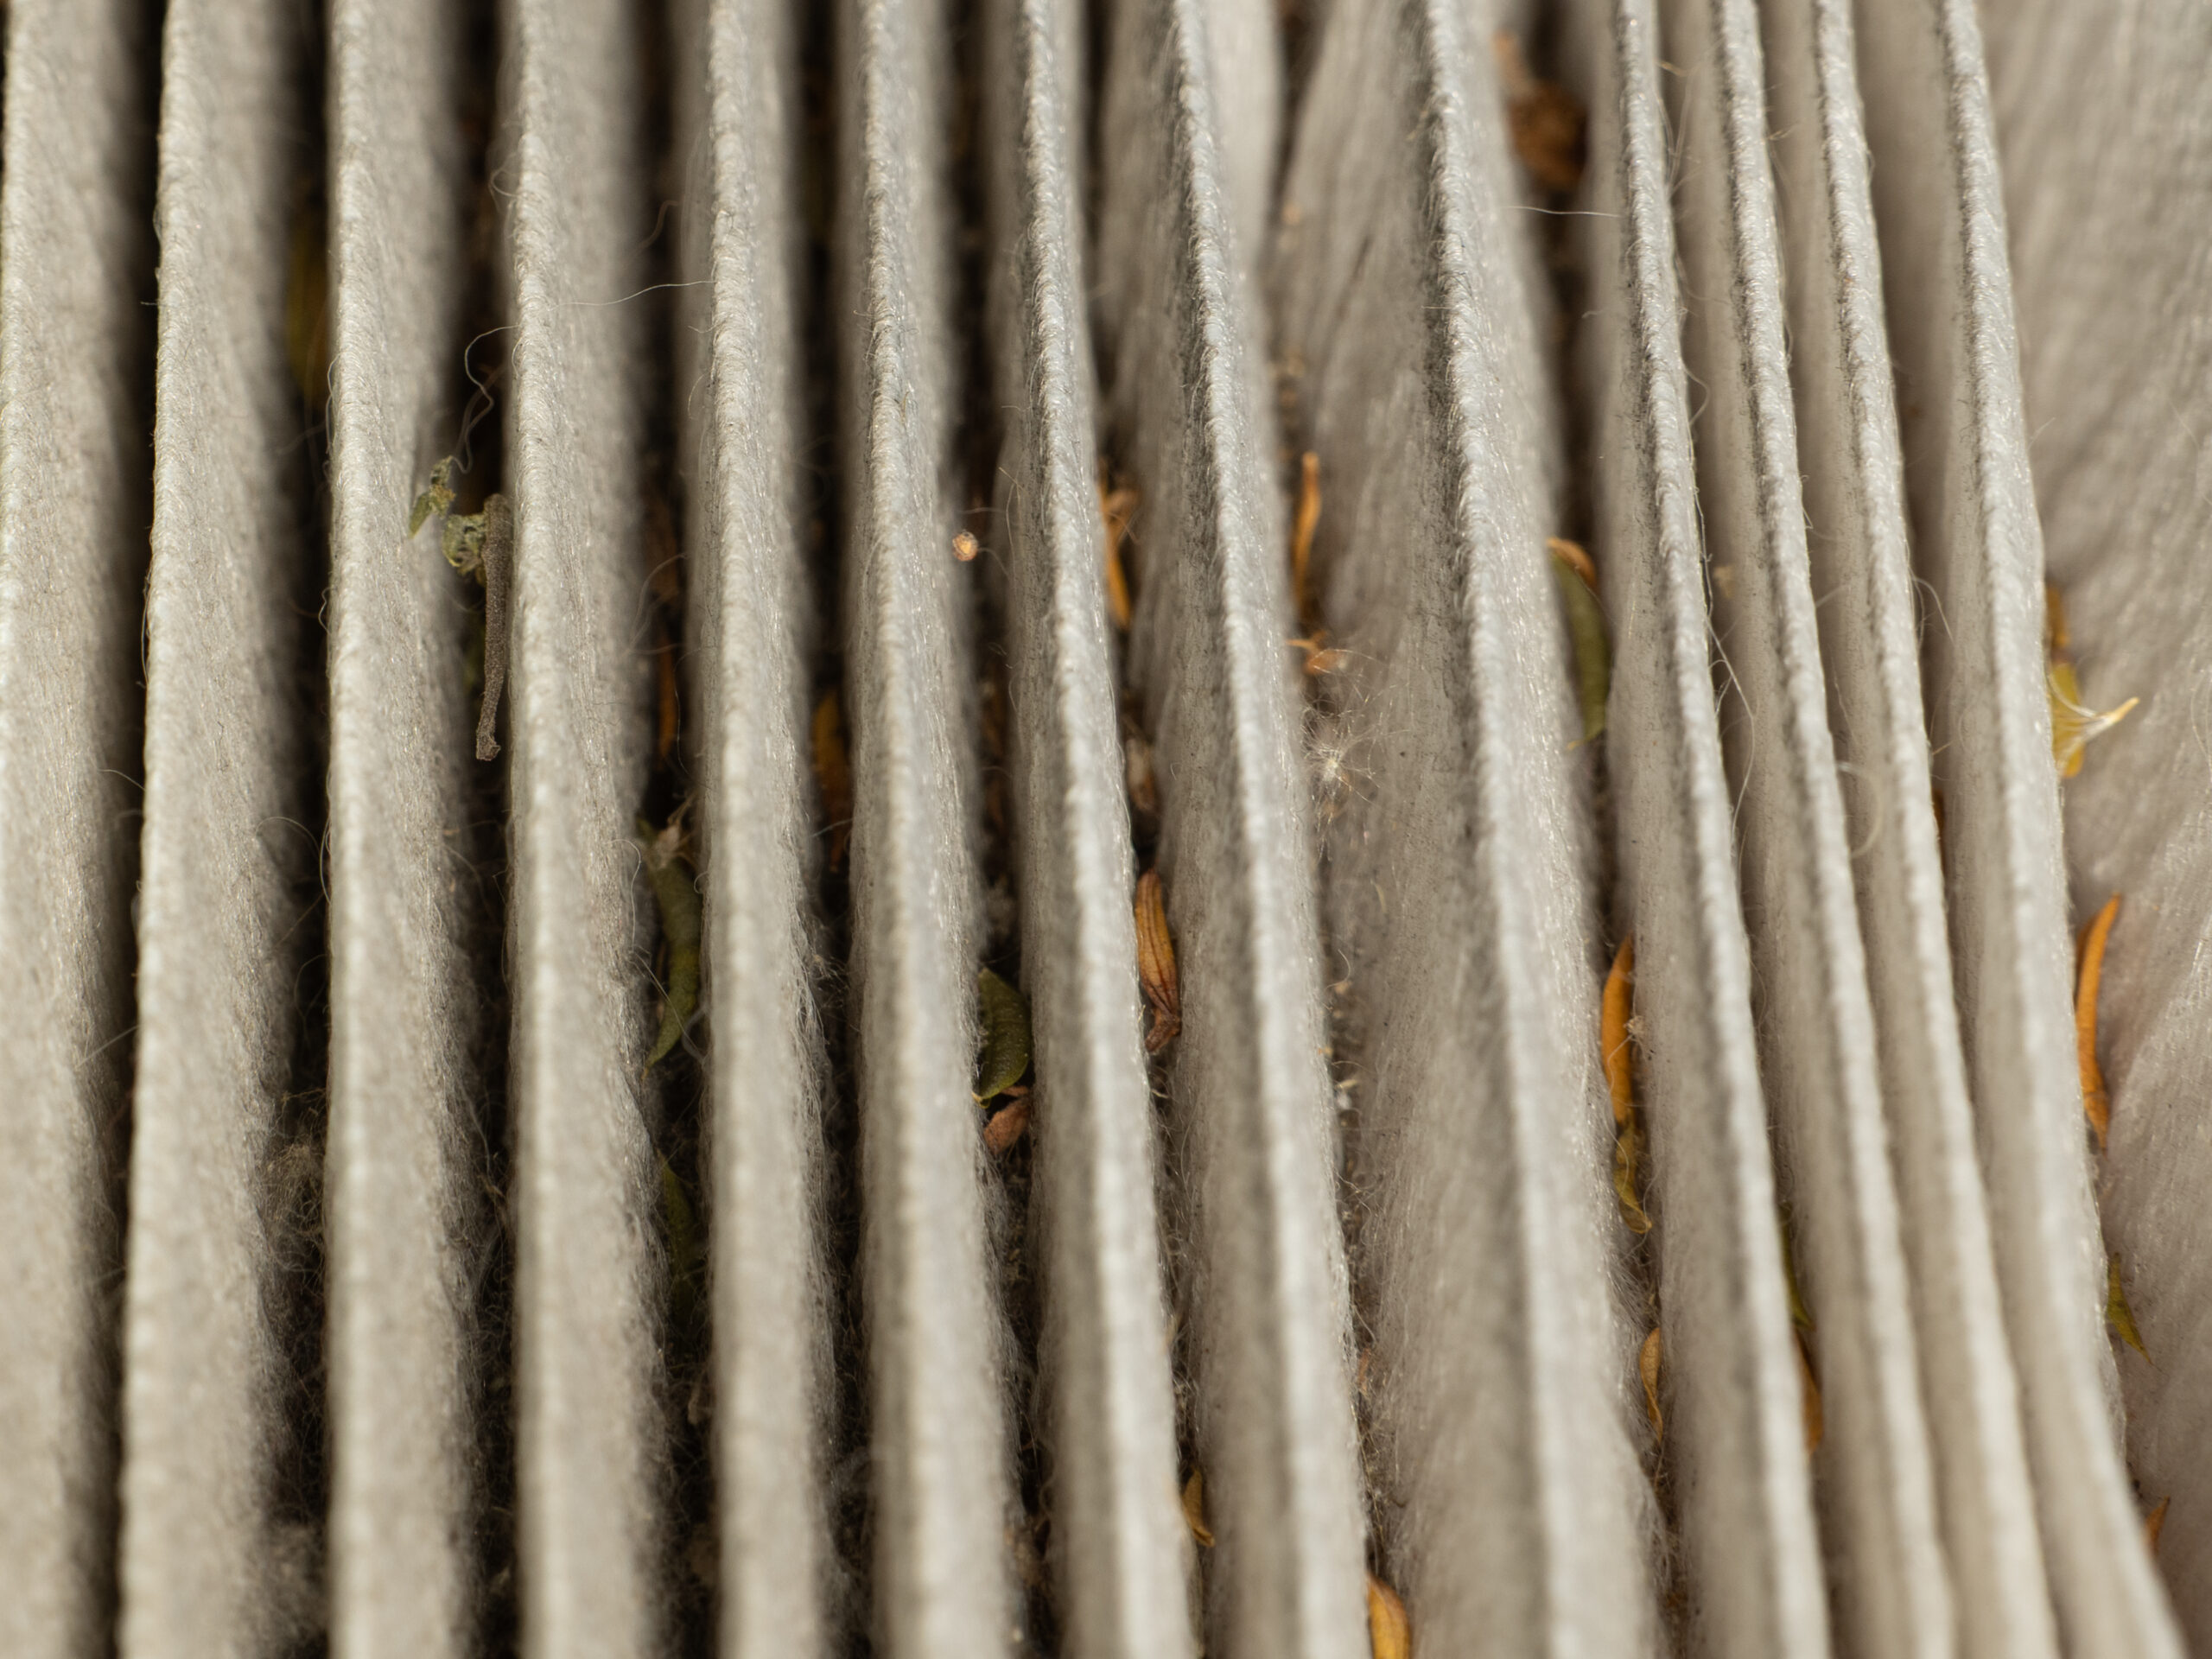
Dirty OEM Cabin Air Filter

aFe Carbon Cabin Air Filter
Signs You May Need Your Cabin Air Filter Changed
- Reduced airflow from the vents, less cooling
- Longer time to cool the cabin
- Louder fan noise due to restricted airflow
- Musty or unpleasant odors inside the vehicle
If you’re experiencing any of these issues, they may be signs that your cabin air filter needs to be replaced.
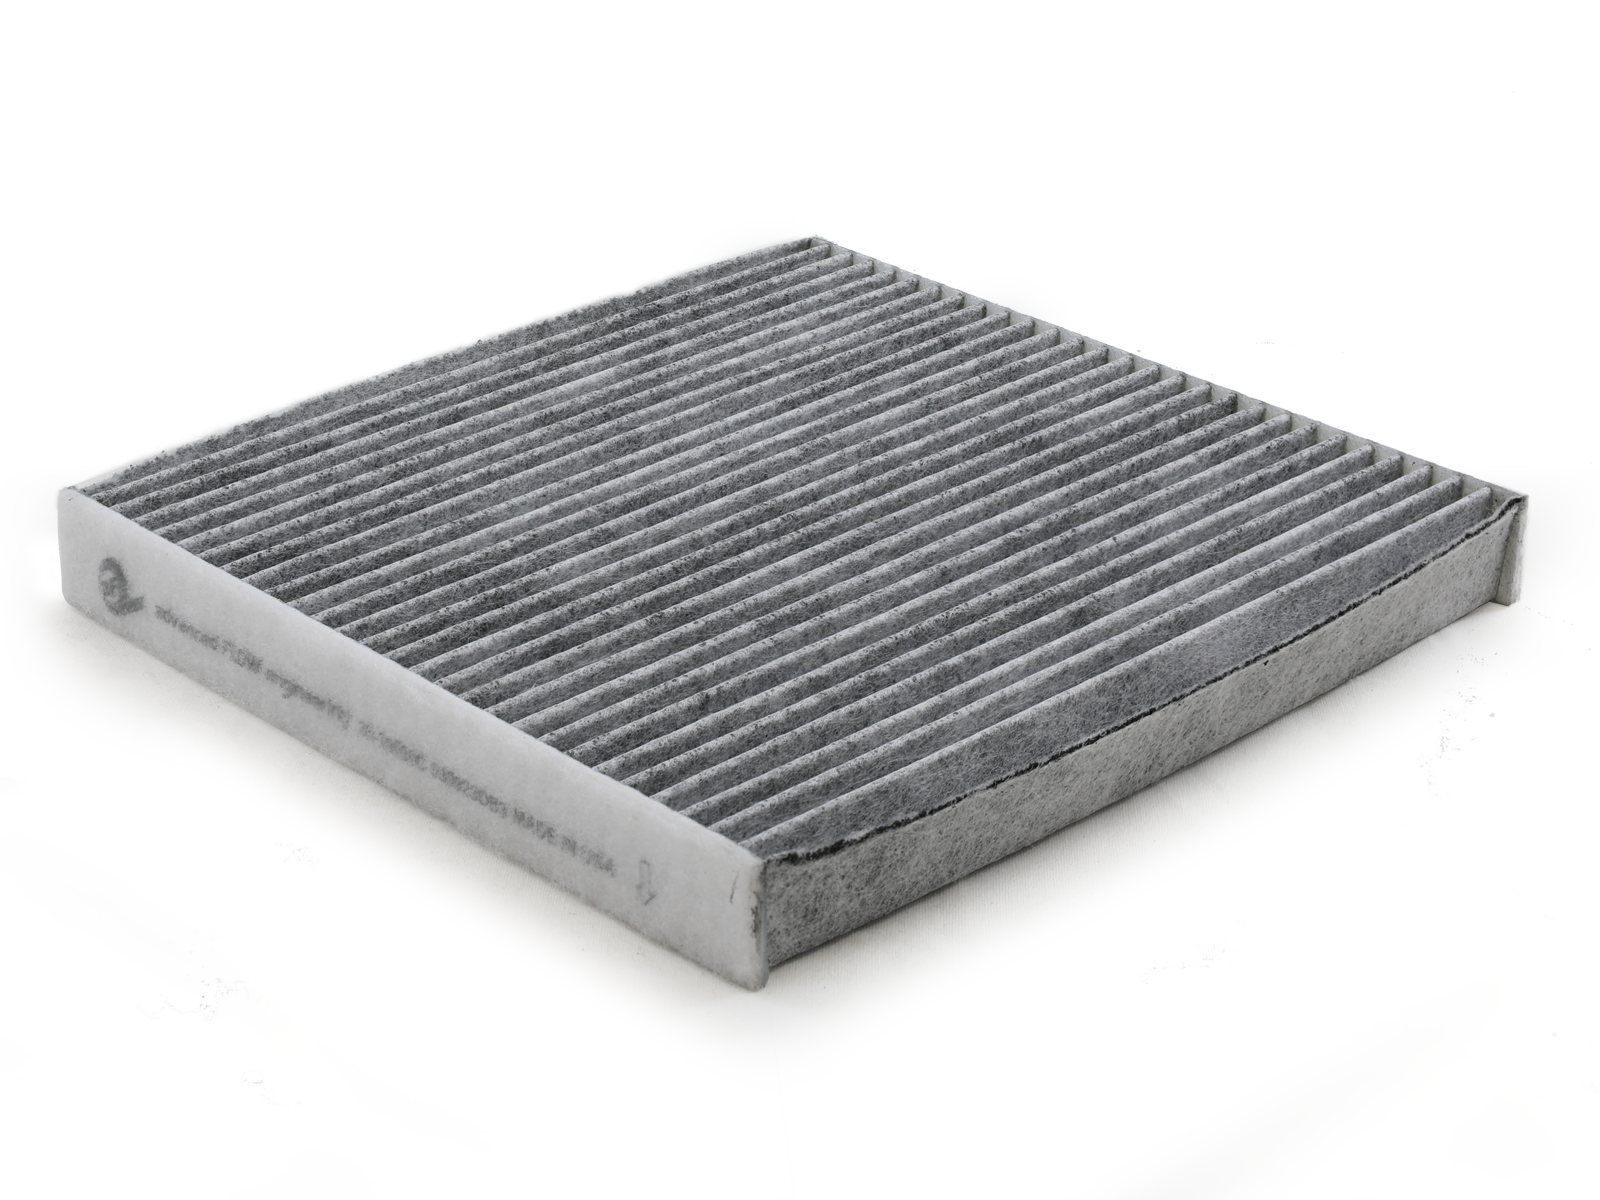
Upgrade to aFe Carbon Cabin Air Filter
A clean aFe cabin air filter helps keep the air inside your vehicle fresh by trapping dust, pollen, dirt, and other airborne particles before they enter the cabin. It also features activated carbon to help reduce odors, pollution, and other contaminants for cleaner air while you drive.
Cabin air filters are often overlooked during routine maintenance. For the best performance, replace your cabin air filter every 12,000 to 15,000 miles, or follow your vehicle manufacturer’s recommended service interval.
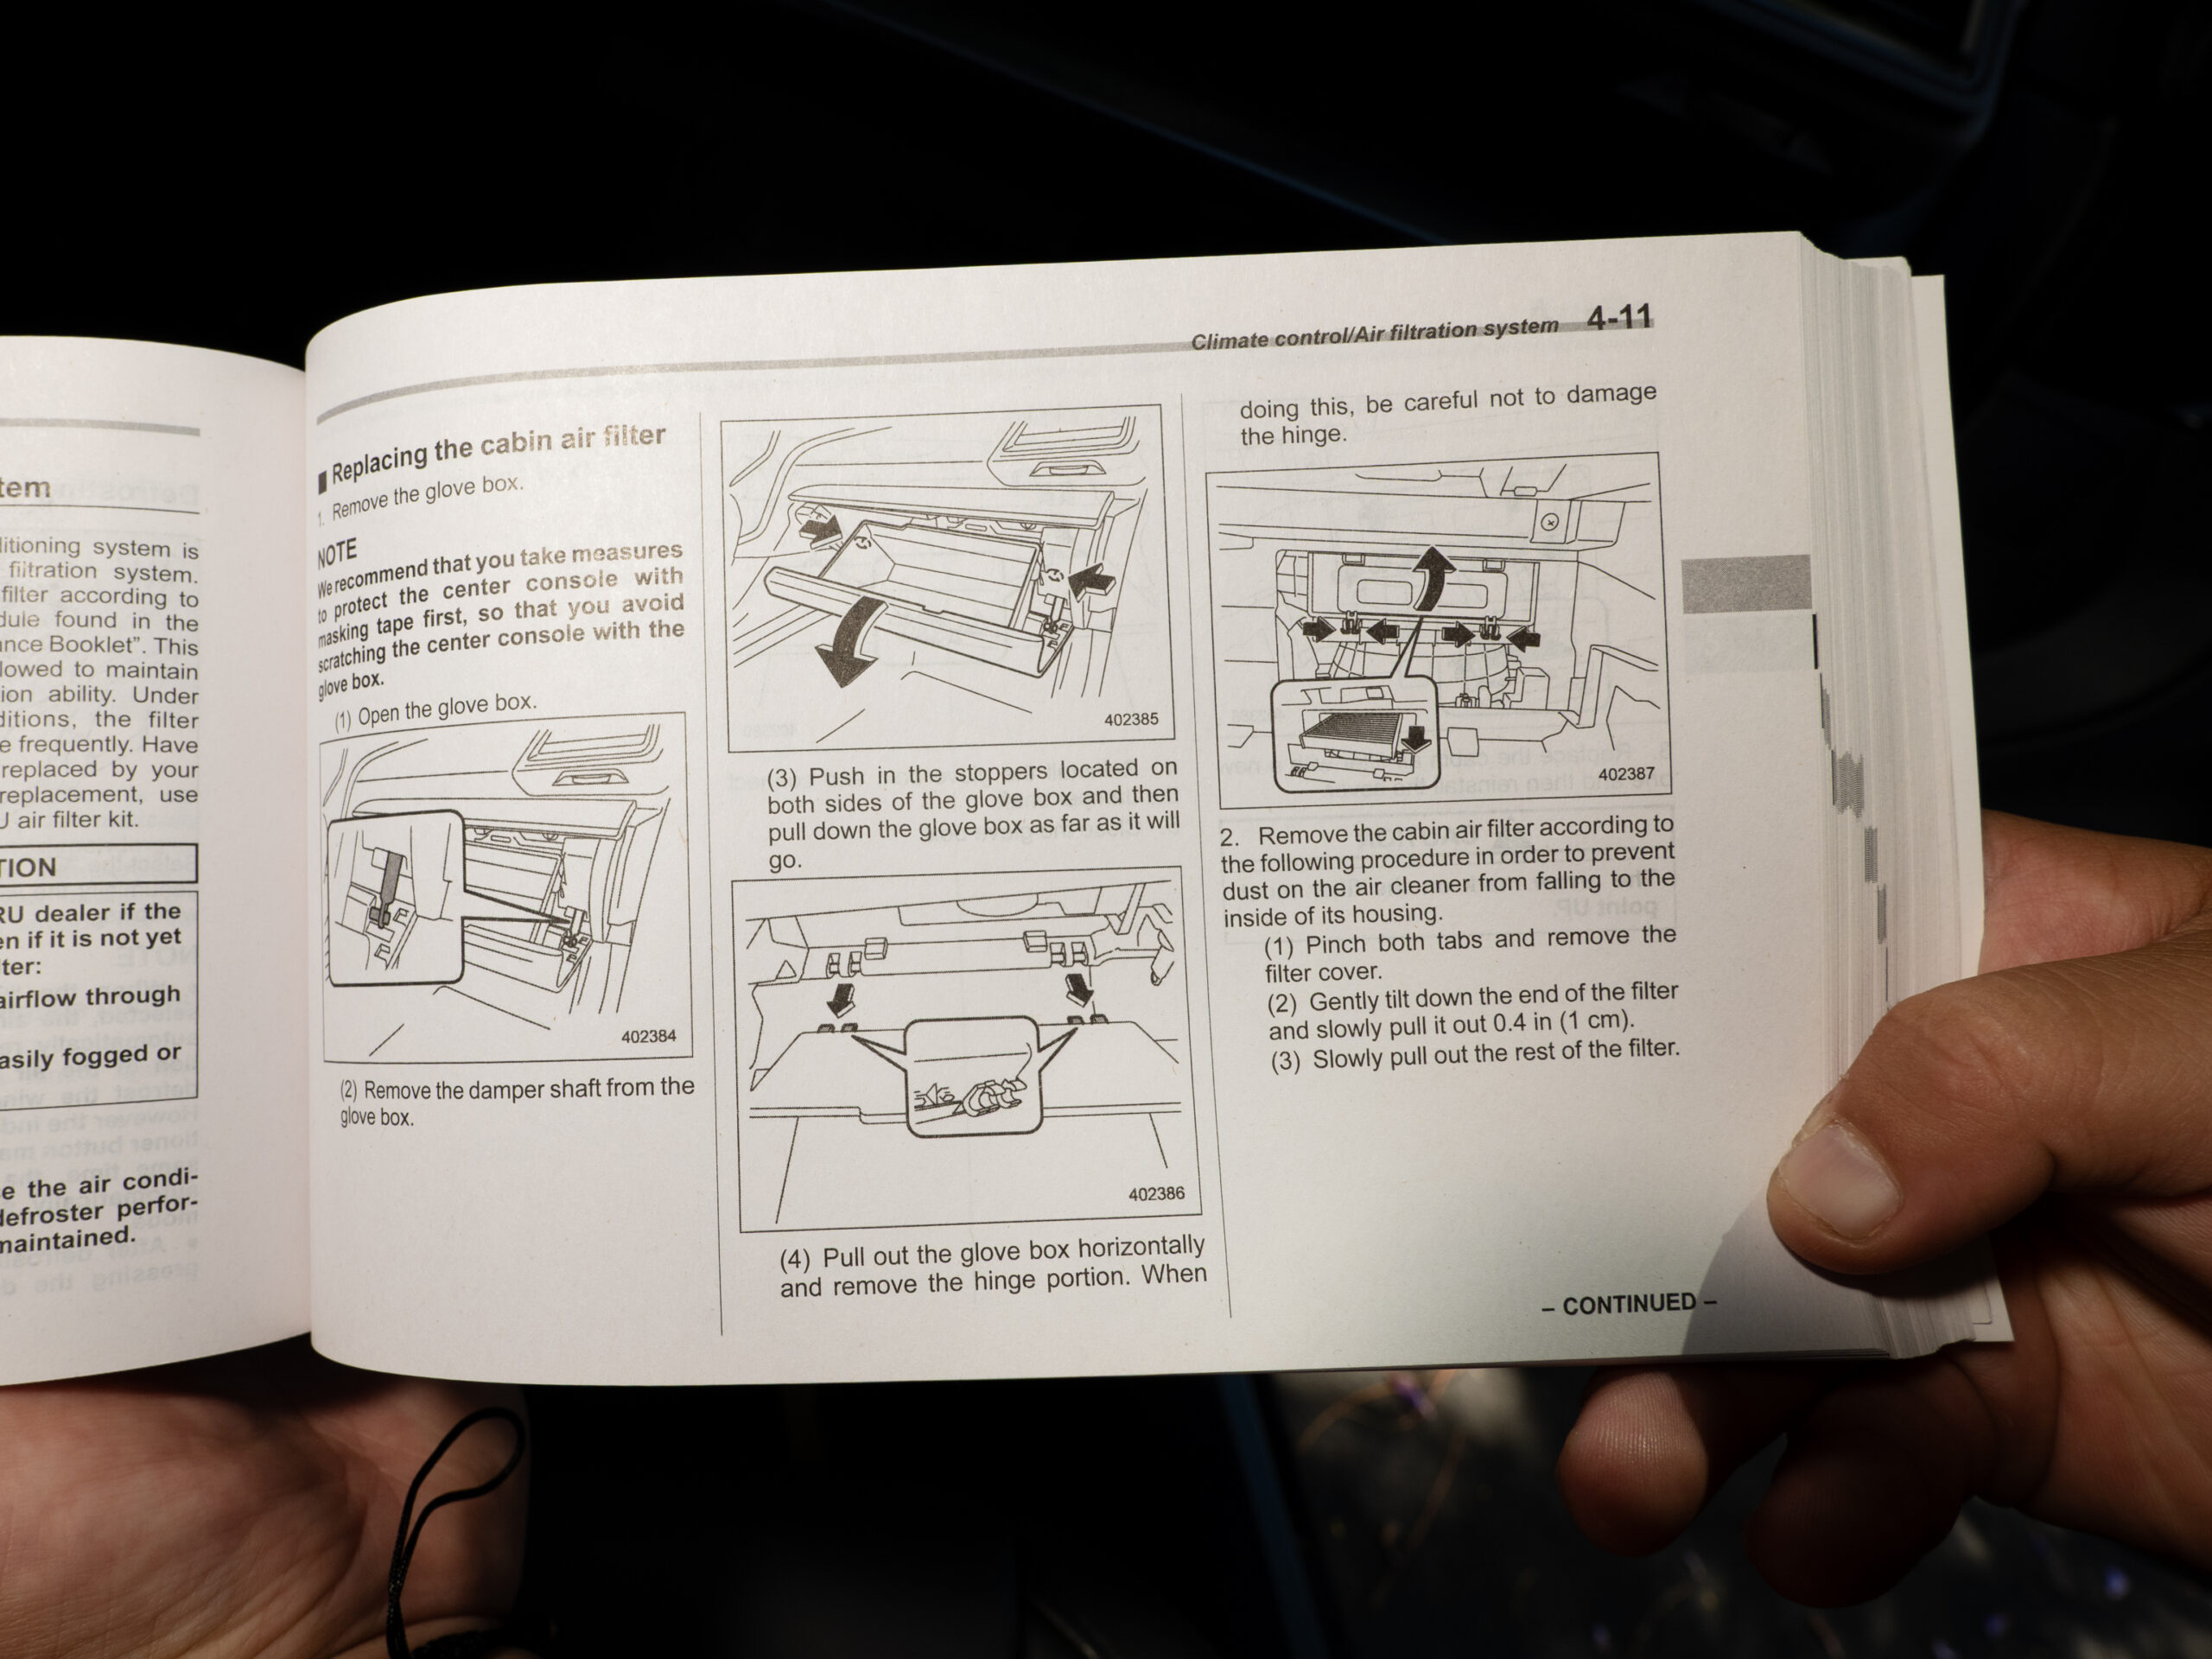
Step-by-Step Guide: How to Change Your Cabin Air Filter
Replacing your cabin air filter yourself is a quick and simple maintenance task that can save you time and service costs. In this guide, we’ll walk you through locating and replacing your vehicle’s cabin air filter step by step. We will be using an aFe carbon cabin air filter, which you can find on the aFe POWER website by searching by your vehicle’s year, make, model, fuel type, and engine.
What You’ll Need
Before replacing your cabin air filter, consult your vehicle’s owner’s manual. Every vehicle is different, and the location of the cabin air filter can vary by make and model. In most vehicles, however, the cabin air filter is located behind the passenger-side glove box, making it relatively easy to access and replace.
Step-by-Step Installation Instructions
Step 1: Open the Glove Box and Empty It (If Needed)
Remove any items stored in the glove box to give yourself enough room to work and prevent anything from falling out during the process.
Step 2: Release the Side Stops and Lower the Glove Box
Gently press the sides of the glove box inward to release the built-in stops, allowing the glove box to lower and expose the cabin air filter housing.
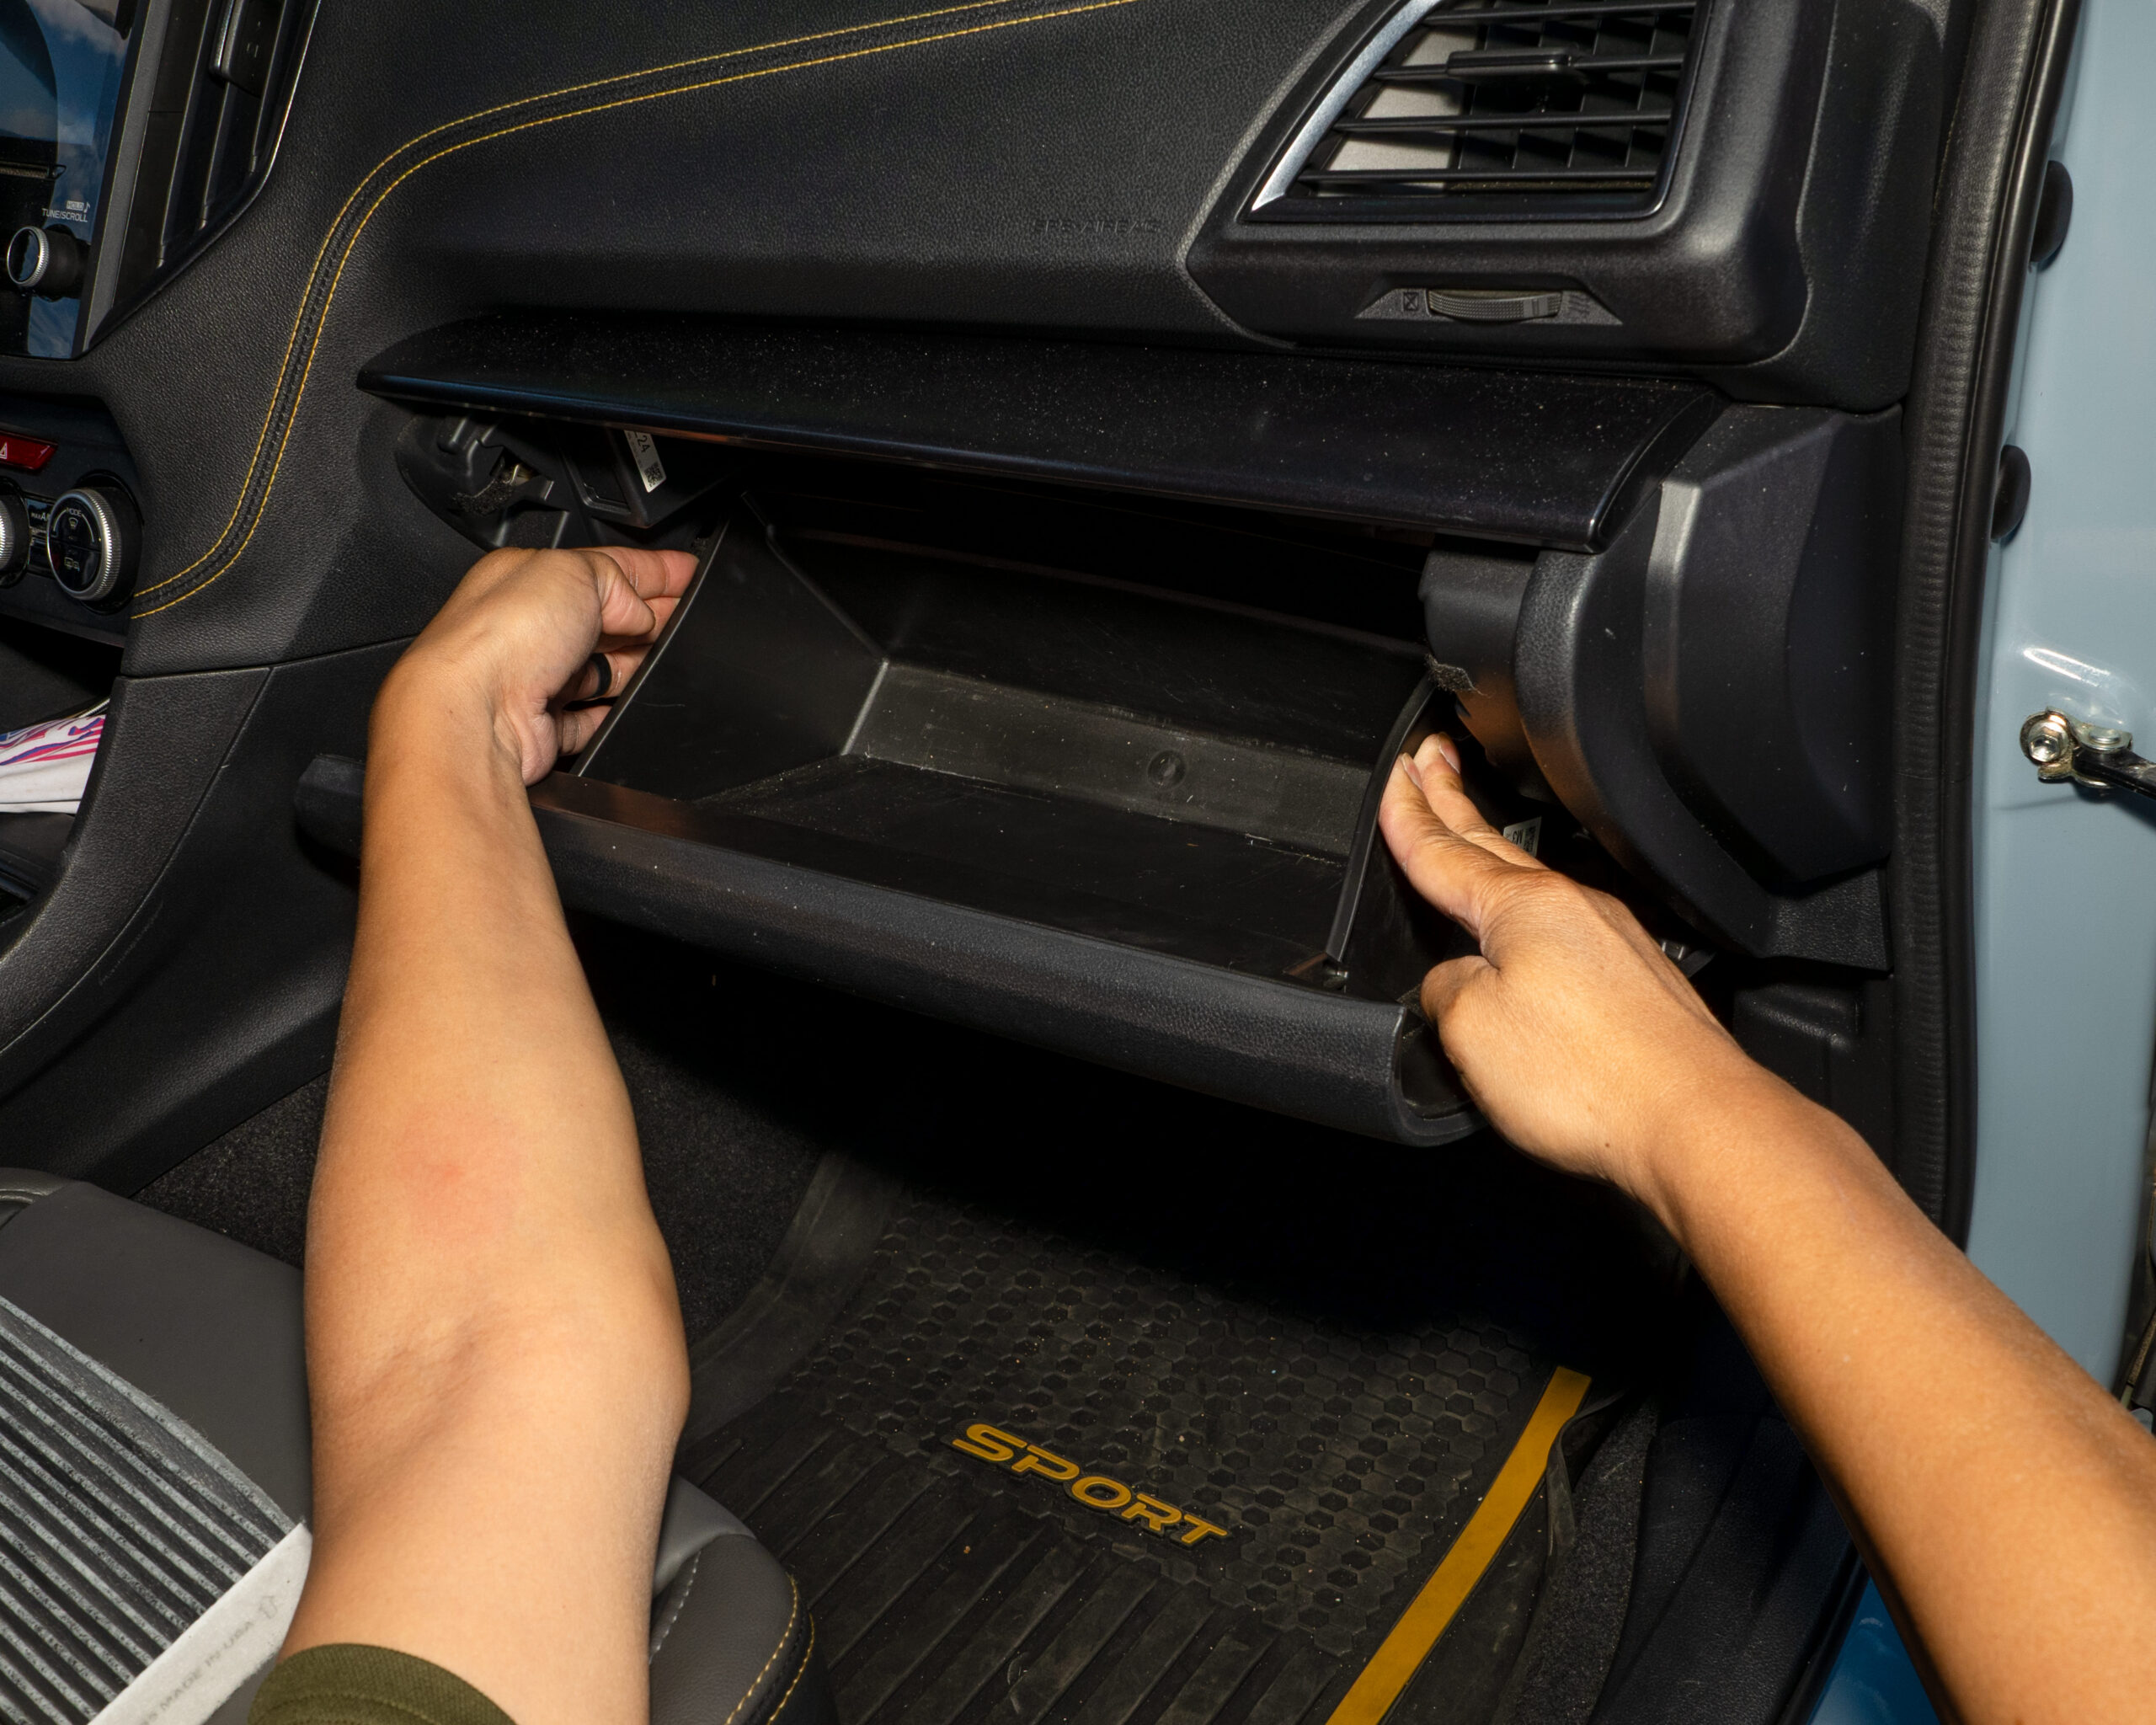
Glove Box For 2023 Subaru CrossTrek
Step 3: Locate the Cabin Air Filter Housing and Remove the Cover
Find the rectangular cabin air filter housing behind the glove box and unclip or remove the cover to access the filter. Note: Every vehicle is different, so please refer to your owner’s manual.
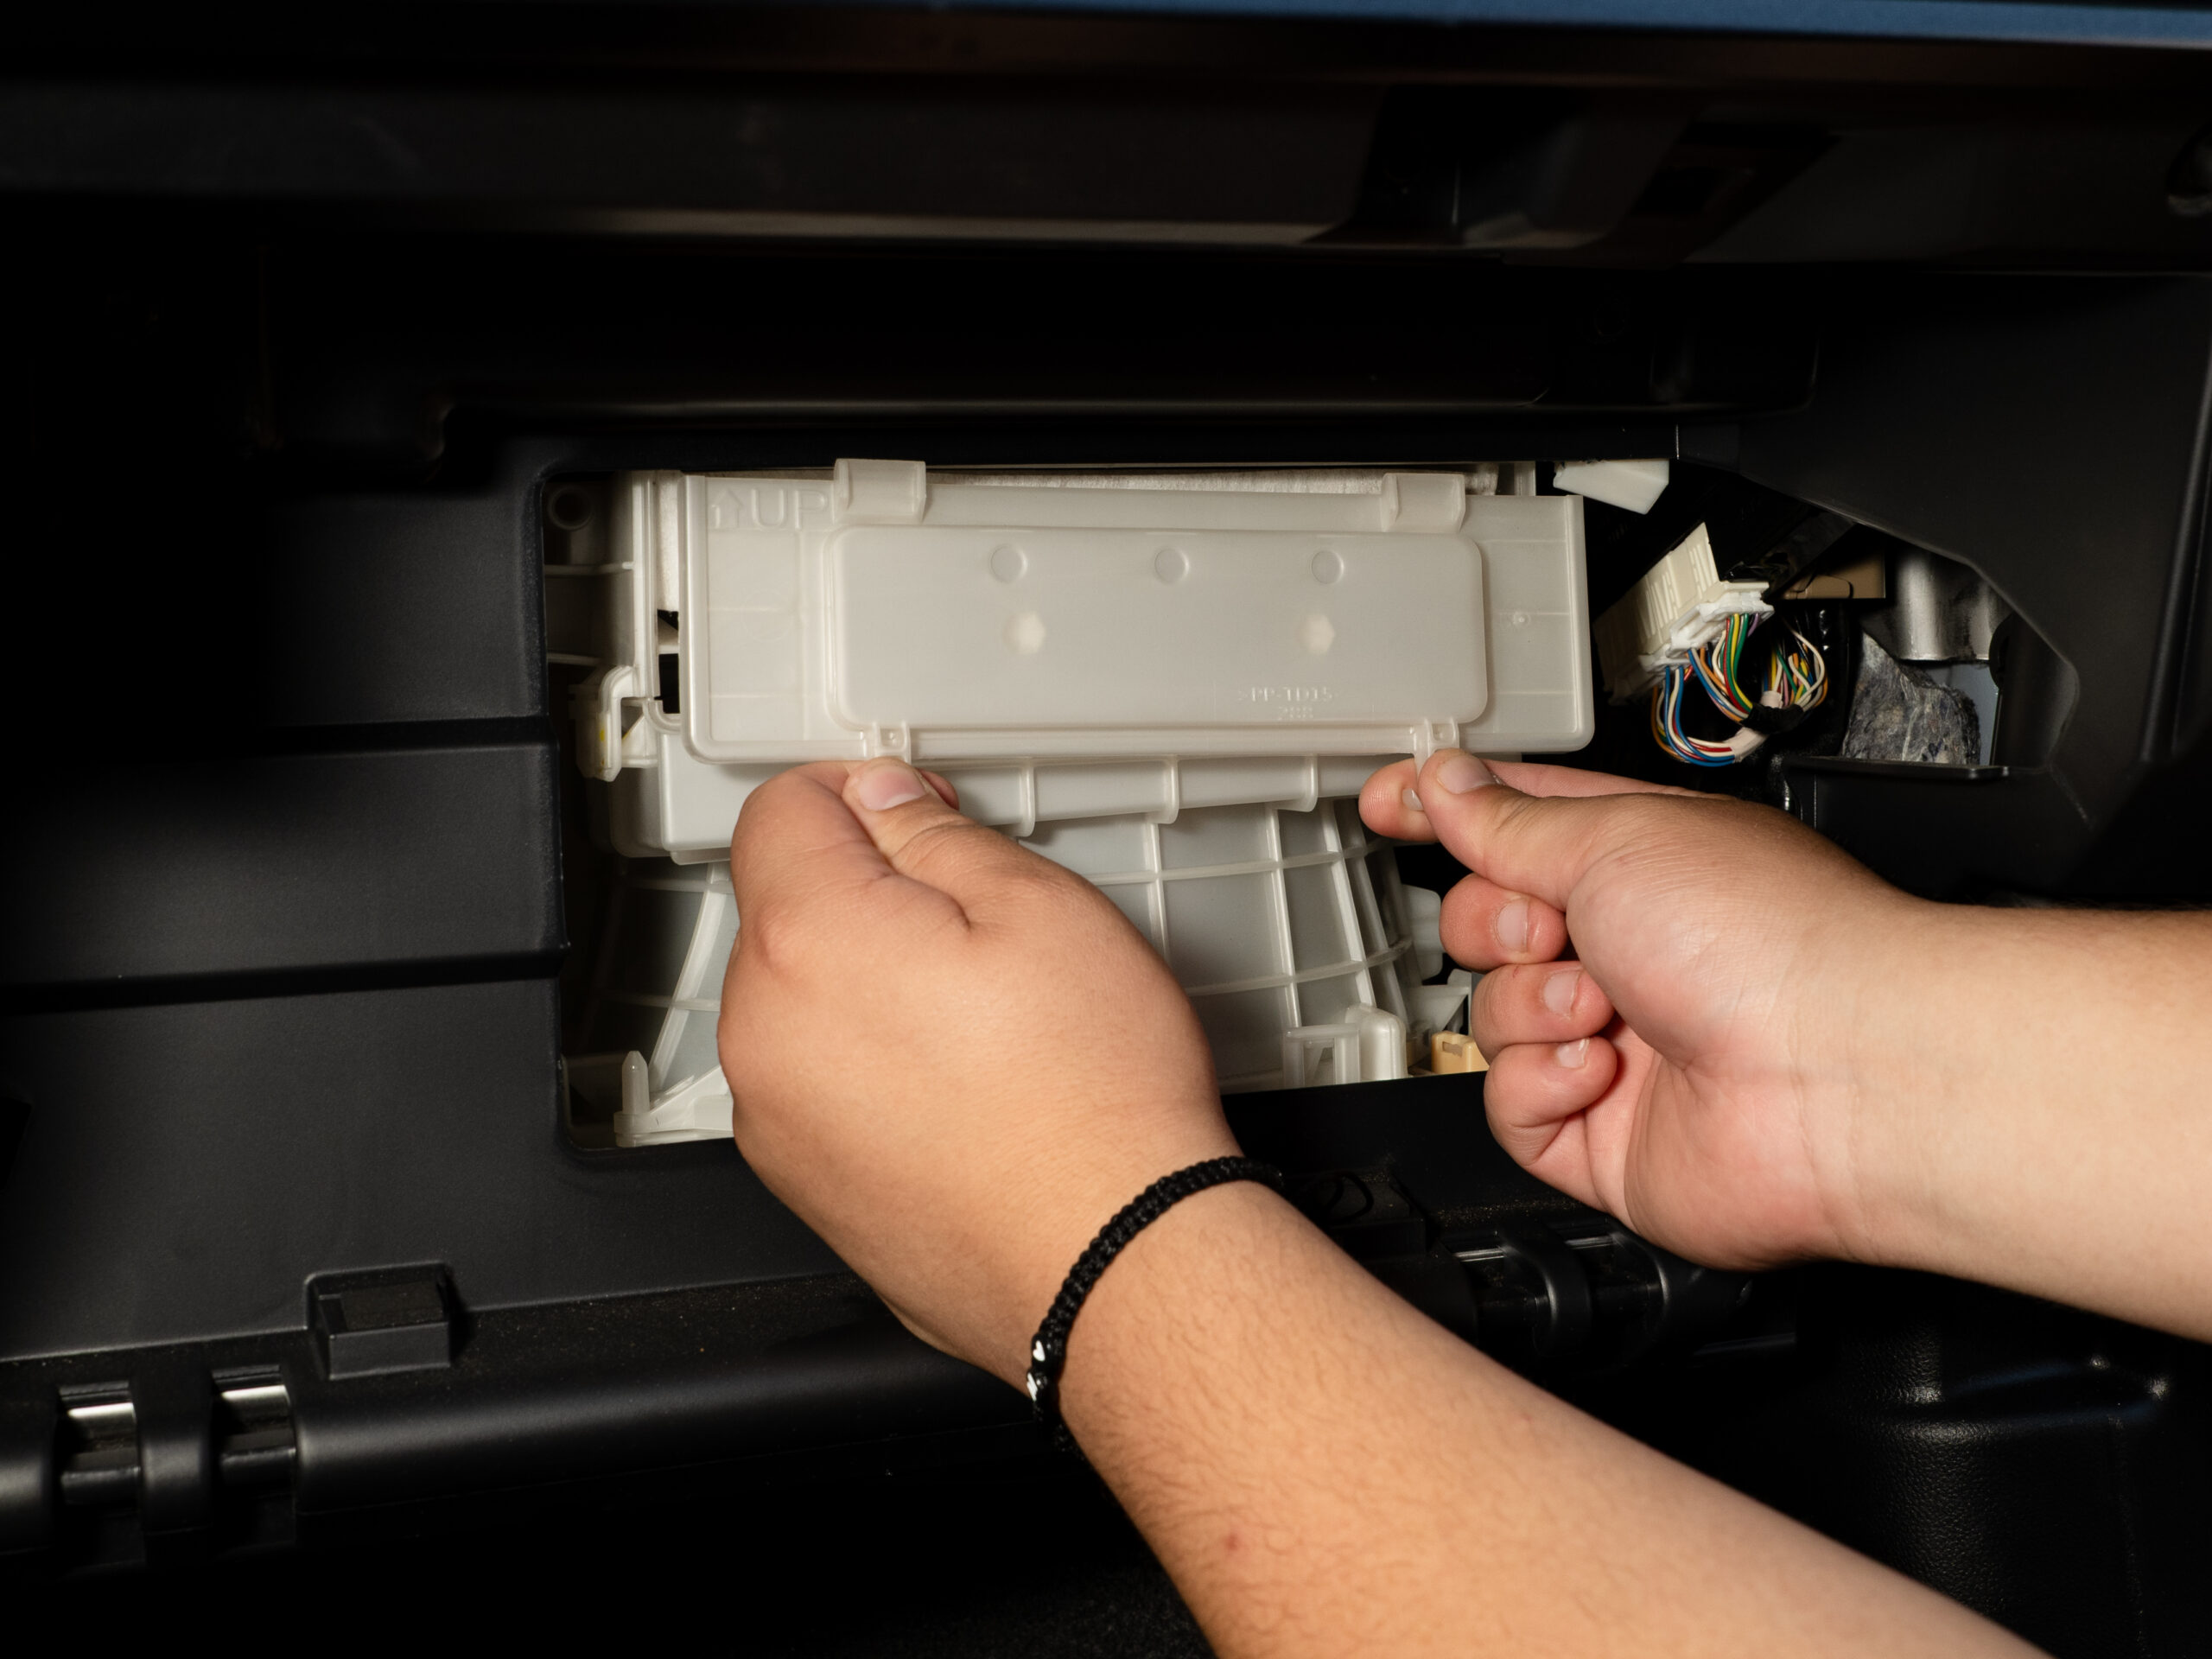
Step 4: Note the Airflow Direction, Then Remove and Inspect the Old Cabin Air Filter
Before removing the old filter, note the direction of the airflow arrow. Pull the filter out and inspect it for dirt, dust, leaves, and other debris.
Step 5: Refer to the Owner’s Manual to Confirm the Correct Airflow Direction
Check your owner’s manual if you’re unsure of the correct airflow direction. Installing the filter correctly helps maintain proper airflow and filtration.
Remove the Cover of the Cabin Air Filter
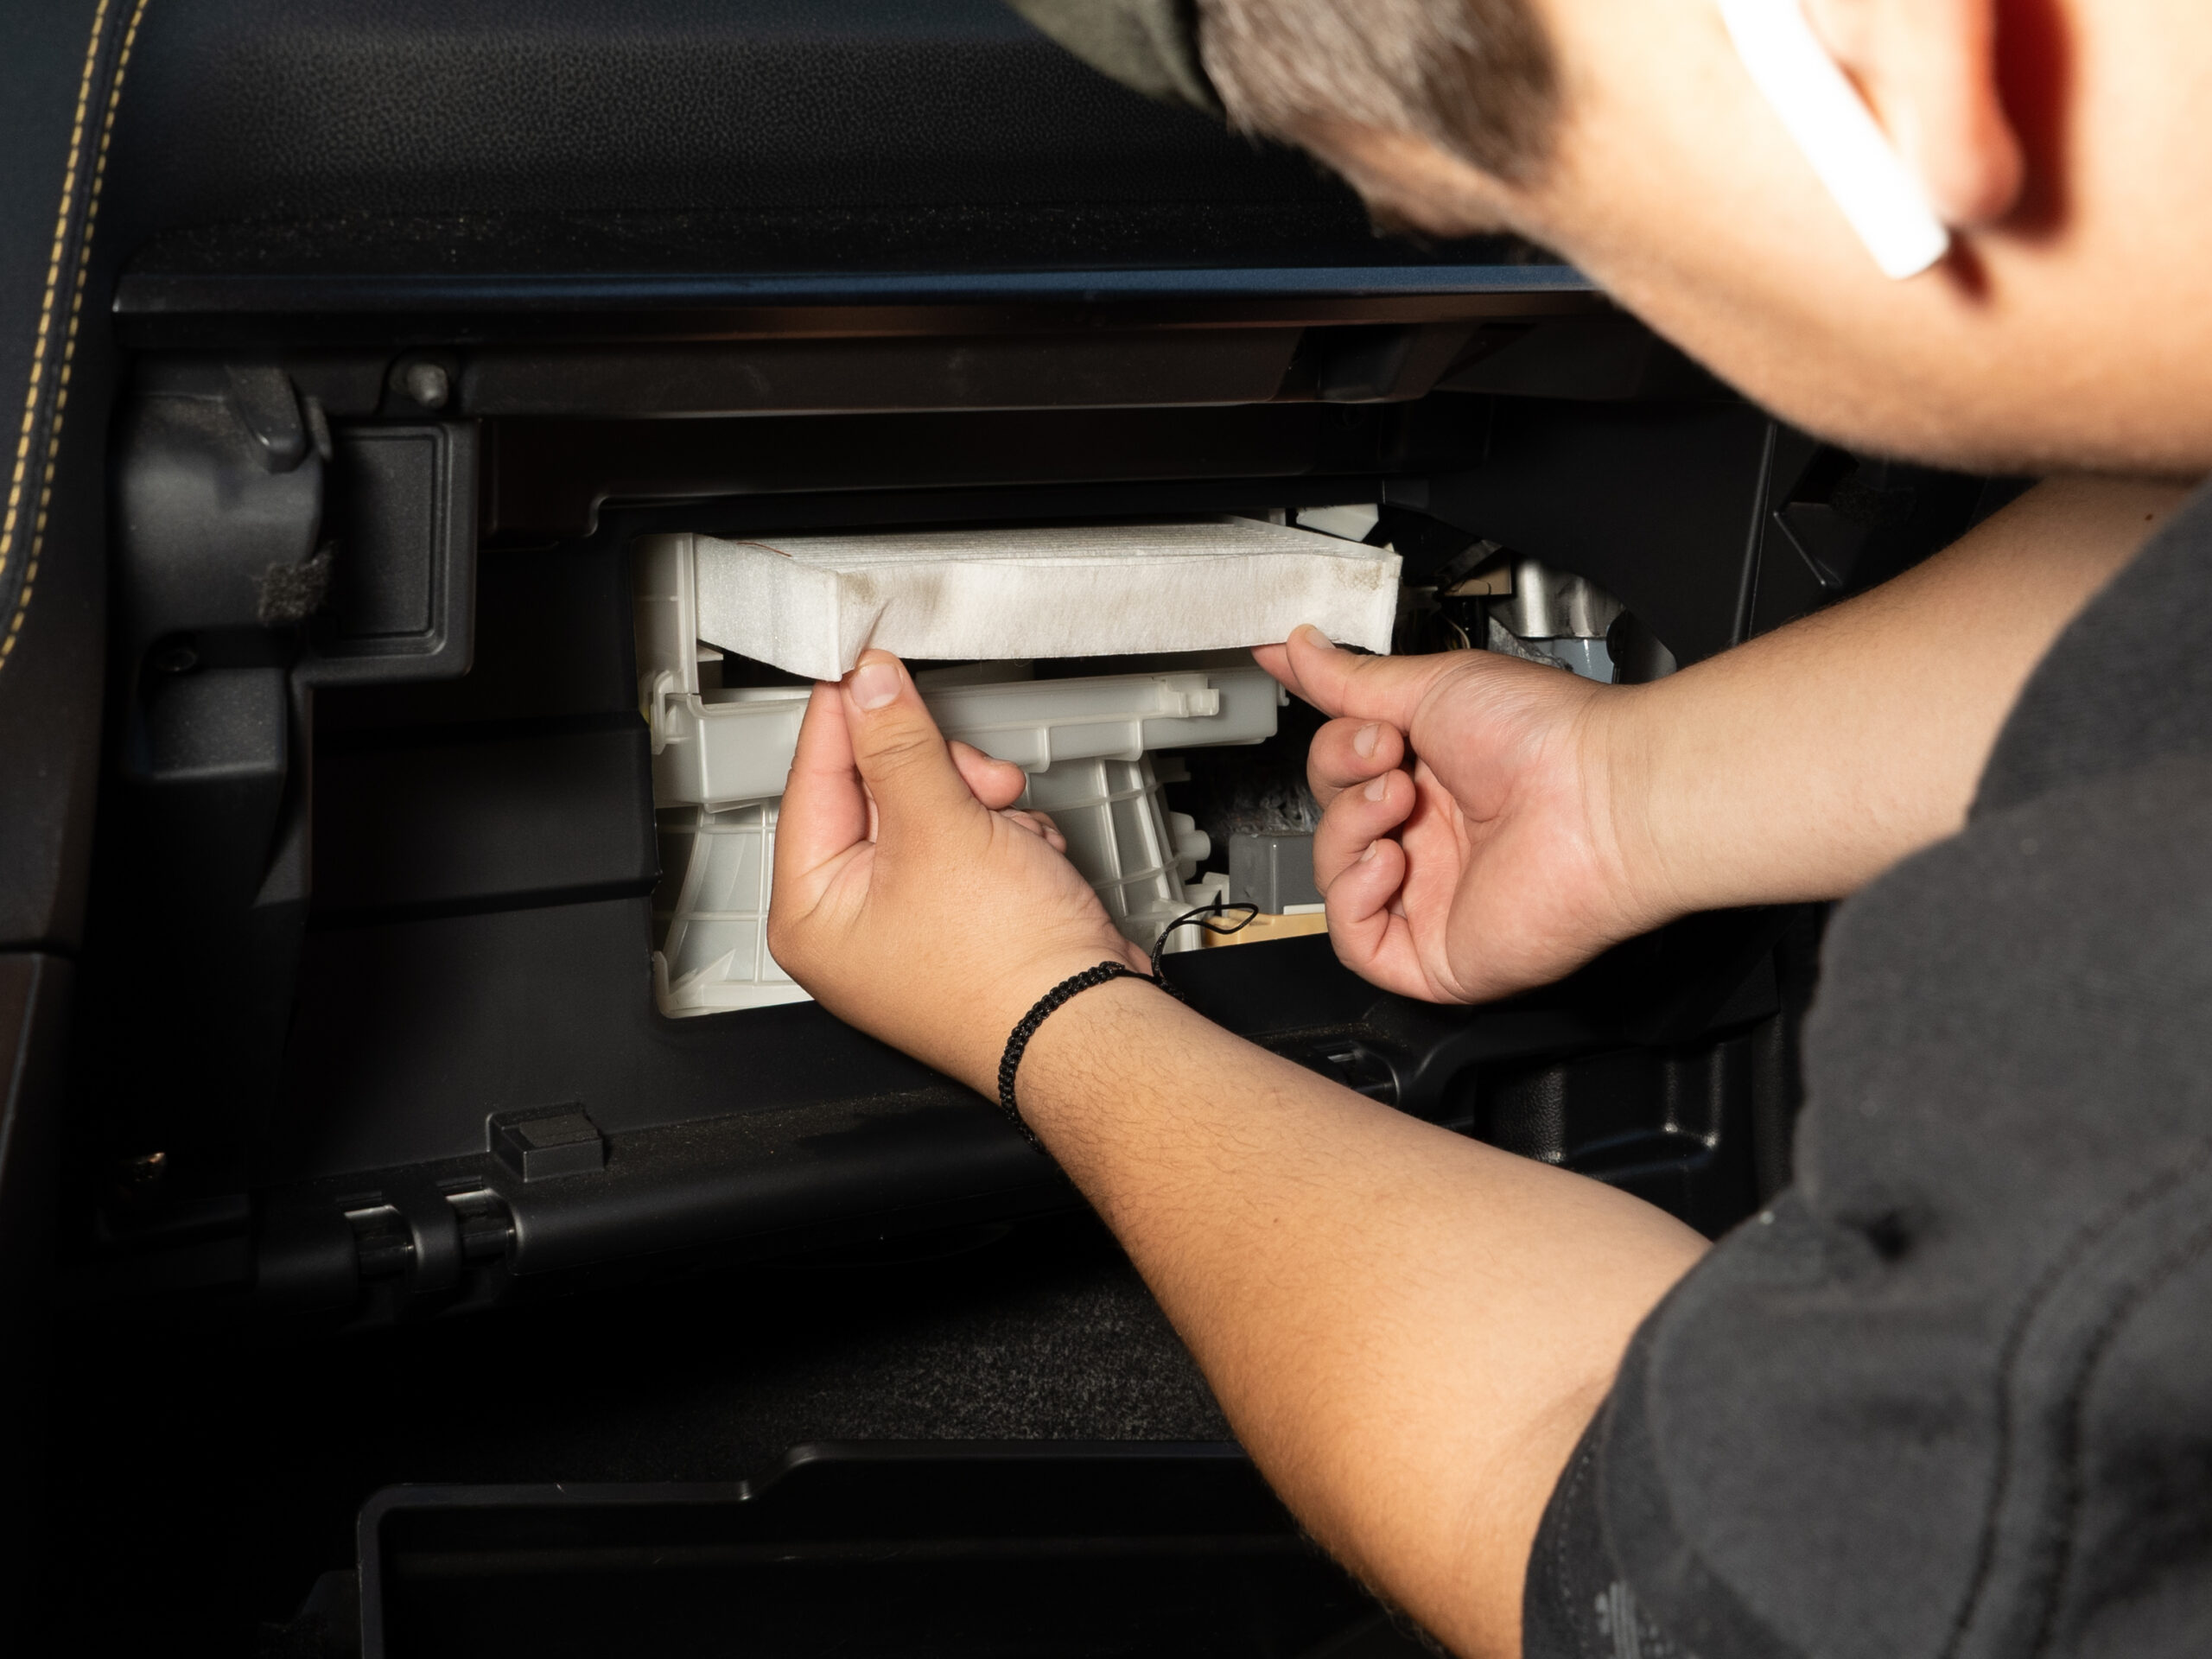
Remove Old Cabin Air Filter

Double Check the Arrow and Refer to Your Owners Manuel For the Direction of Air Flow
Step 6: Install the New Cabin Air Filter into the Housing
Slide the new cabin air filter into the housing, making sure the airflow arrow is facing the correct direction.

Placing aFe Carbon Cabin Air Filter
Step 7: Reinstall the Cabin Air Filter Cover and Return the Glove Box to Its Original Position
Secure the cabin air filter cover, then lift the glove box back into place and reattach the side stops
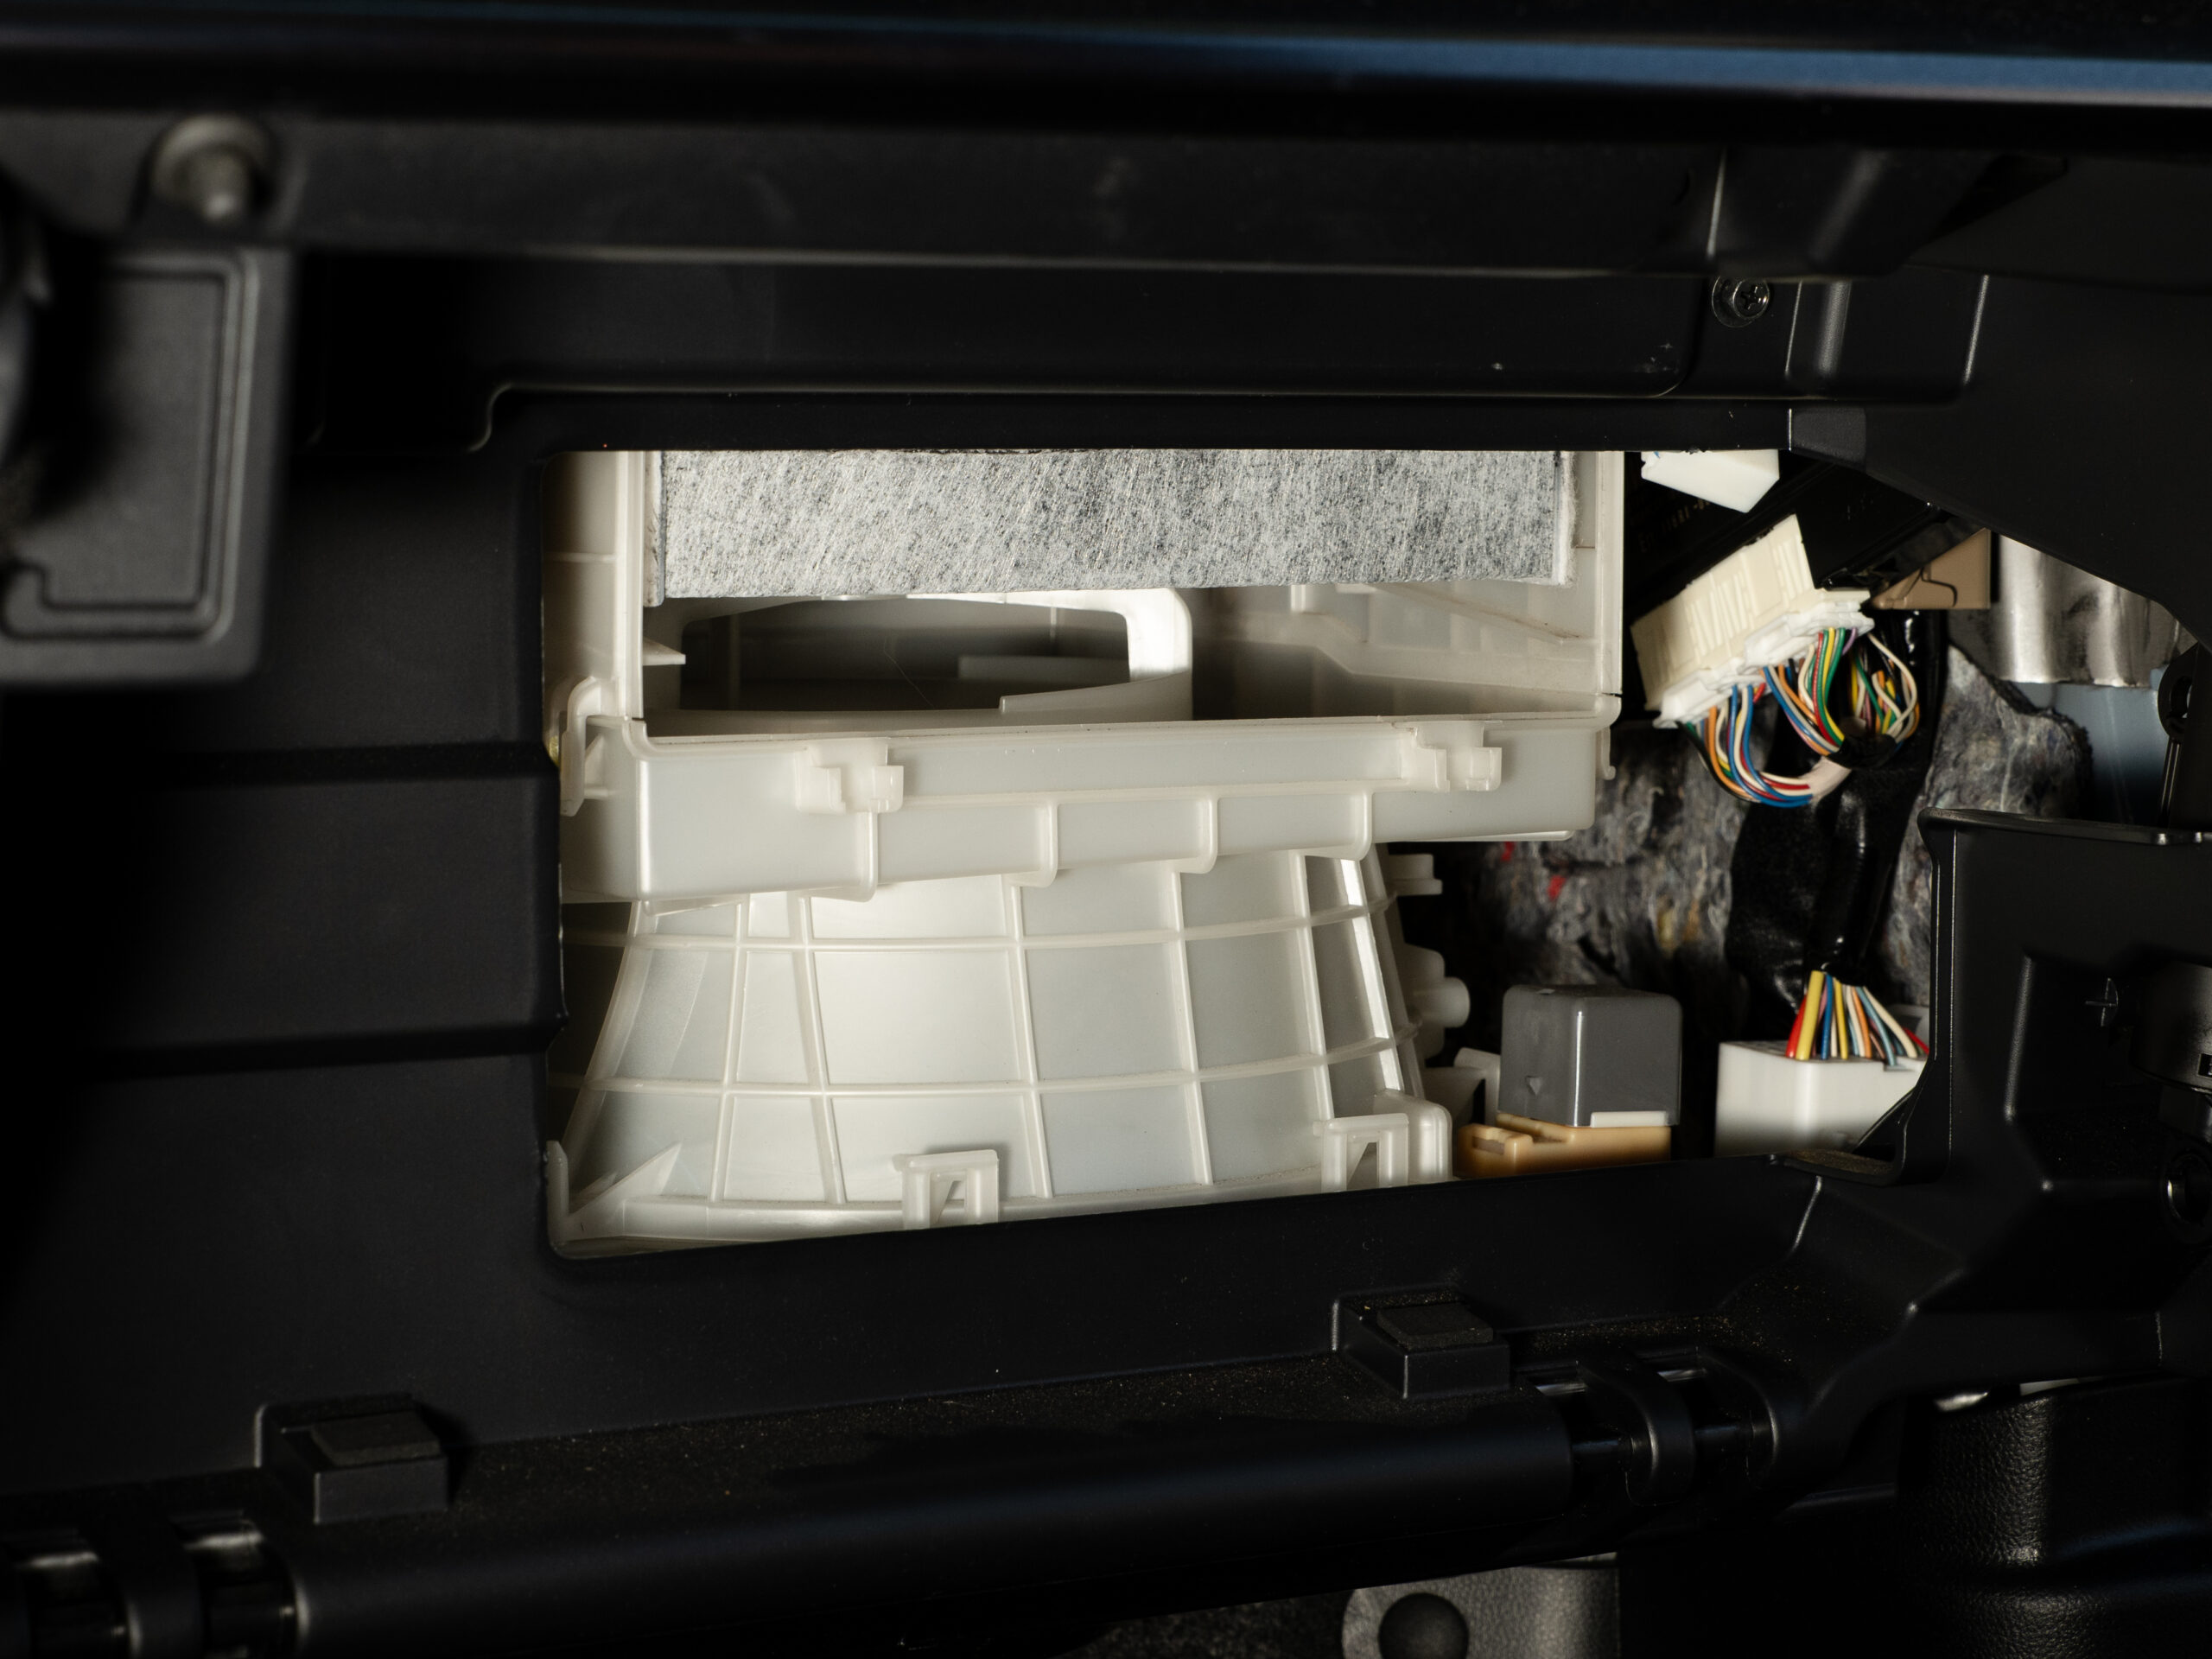
Make Sure it is Snug, and Place the Cabin Cover back, and You Are Done
Final Thoughts
Replacing your cabin air filter is one of the simplest maintenance tasks you can perform, yet it’s often overlooked. A clean cabin air filter helps keep the air inside your vehicle cleaner, improves airflow, reduces unwanted odors, and helps your HVAC system operate more efficiently—especially during the hot summer months when your A/C is working its hardest.
Whether you’re replacing a dirty filter as part of routine maintenance or upgrading to aFe Cabin Air Filters for cleaner, fresher air, staying on top of your cabin air filter replacement can make every drive more comfortable. If your vehicle is due for a new filter, now is the perfect time to make the change.

Our POWER Professionals are Here to Help.
-
Call us at 1-951-493-7101 or shoot us an email.
-
We’re available to talk Mon–Fri 8am–4pm PST.
-
Factory Store: 232 Granite St. Corona, CA 92879